Begin typing your search above and press return to search. Press Esc to cancel.

ESP8266 NodeMCU V1 Flashing Firmware Update Tutorial 1

How to flashing firmware update of ESP8266 NodeMCU V1 using NodeMCU flasher

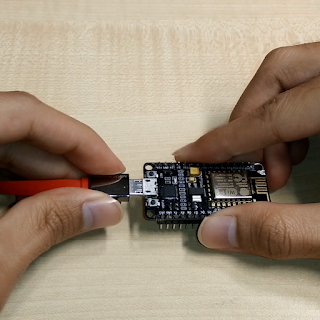
This NodeMCU V1 also known as NodeMCU v0.9 is first version of NodeMCU series. This hardware is based on ESP-12 module of ESP8266 series. The firmware used in this hardware is based on Lua script programming.


ESP8266 NodeMCU V1 WiFi IOT Module Flashing Firmware Update using NodeMCU Flasher Tutorial 1. How to update NodeMCU v1 firmware using NodeMCU Flasher.


Item Required:
1. NodeMCU V1 (Hardware) - http://www.aliexpress.com/wholesale?SearchText=nodemcu+v1
2. ESPlorer (Software) - http://esp8266.ru/esplorer/
3. NodeMCU Flasher (Software) - https://github.com/nodemcu/nodemcu-flasher
4. NodeMCU Firmware (Firmware) - https://github.com/nodemcu/nodemcu-firmware/releases

Steps:
1. Prepare all the hardware required.
2. Download ESPlorer.
3. Download NodeMCU Flasher.
4. Download the latest NodeMCU Firmware.
5. Connect and upload the latest firmware using NodeMCU Flasher.
6. Check the latest version of firmware using ESPlorer.

SUBSCRIBE Youtube Channel for more Tutorial Videos:
Read more ...

ESP8266 NodeMCU V2 Flashing Firmware Update Tutorial 1

NodeMCU V2 also known as NodeMCU v1.0 is the second version of NodeMCU series. Based on ESP-12, this hardware also use Lua script programming

NodeMCU V2 also known as NodeMCU v1.0 is the second version of NodeMCU series. Based on ESP-12, this hardware also use Lua script programming as a default firmware.

NodeMCU V2 ESP8266 WiFi IOT Module Flashing Update Firmware using NodeMCU Flasher Tutorial 1. How to update or upgrade NodeMCU v2 firmware using NodeMCU Flasher.

Item Required:
1. NodeMCU V2 (Hardware) - http://www.aliexpress.com/wholesale?SearchText=nodemcu+v2
2. ESPlorer (Software) - http://esp8266.ru/esplorer/
3. NodeMCU Flasher (Software) - https://github.com/nodemcu/nodemcu-flasher
4. NodeMCU Firmware (Firmware) - https://github.com/nodemcu/nodemcu-firmware/releases

Steps:
1. Prepare all the hardware required.
2. Download ESPlorer.
3. Download NodeMCU Flasher.
4. Download the latest NodeMCU Firmware.
5. Connect and upload the latest firmware using NodeMCU Flasher.
6. Check the latest version of firmware using ESPlorer.


SUBSCRIBE Youtube Channel for more Tutorial Videos:
Read more ...

Arduino LED Blinking Tutorial 2

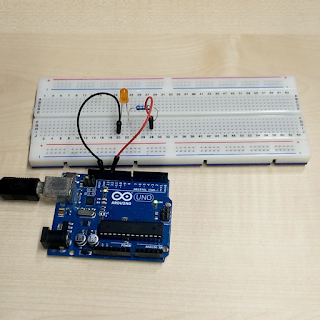
This is tutorial 2 for Arduino. Readers will learn on how to program LED blinking using Digital Pin of Arduino UNO.

This is tutorial 2 for Arduino. Readers will learn on how to program LED blinking using Digital Pin of Arduino UNO. In this tutorial, Pin 12 of digital I/O will be used as an output. There are already built-in LED Pin 13 in this board. But in this tutorial we will use external LED and connects with digital Pin of Arduino UNO.


1. Prepare all the components:

Before we start with the tutorial, you need to prepare all the require components. You will need Arduino Uno board, breadboard, 1K Ohm resistor, LED, USB cable and laptop. Below is all the items required in this tutorial.


Arduino Uno Board
Breadboard
1k ohm Resistor
LED
USB cable
Laptop


2. Draw a schematics:

Now will all components prepared, we will draw a schematic so that we will refer to this connection before we connect them.


LED Blinking Tutorial Schematic


3. Connects all components:

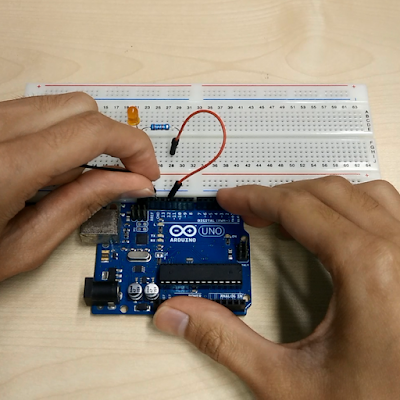
We will connect GND Pin and Pin 12 of Arduino to breadboard. GND pin will be connect to negative pin of LED while Pin 12 will connect with resistor. Resistor will connect with positive Pin of LED.


Connecting all components for LED blinking tutorial.


4. Program Arduino with LED blinking interval of 1 second:

Now, let's write the first code. The first code is to make LED blink with 1 second interval. Arduino will send HIGH signal to Pin 12 with 1000 ms delay and then LOW signal to Pin 12 with 1000 ms. This code will continuously run as they are in the Void loop.

Arduino code for LED blinkin with 1s interval

LED blinking demo with 1s interval (Turn ON)
LED blinking demo with 1s interval (Turn OFF)


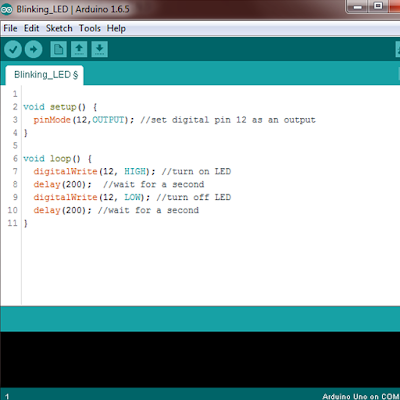
5. Program Arduino with LED blinking interval of 0.2 second (faster):

Now, let's write the second code. We will modified previous code to make it blinks faster. Delay value of 1000 is changed to 200.

Arduino code for LED blinkin with 0.2s interval
LED blinking demo with 0.2s interval (Turn ON)
LED blinking demo with 0.2s interval (Turn OFF)

DONE!


Below is video tutorial for this LED blinking.


Arduino LED blinking or blink led tutorial projects Part 2


Steps:
1. Prepare all components
2. Draw a schematic
3. Connect all components
4. Program Arduino with LED blinking interval of 1 second
5. Program Arduino with LED blinking interval of 0.2 second


SUBSCRIBE Youtube Channel for more Tutorial Videos:
Read more ...

How to charge lithium ion battery using Micro USB 5V TP4056

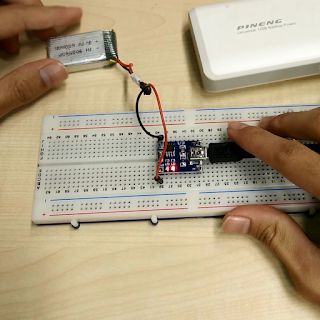
TP4056 is a lithium ion battery charger module. In this tutorial, you will learn step by step on how to charge lithium ion battery using this module.

TP4056 is a lithium ion battery charger module. In this tutorial, you will learn step by step on how to charge lithium ion battery using this module. Power bank will be used a main power source.


How to charge lithium ion battery using Micro USB 5V TP4056 using power bank

Items Required:
1. TP4056 Module
2. Lithium Battery
3. Wire Jumper
4. Mini USB Cable
5. Breadboard
6. Power Bank


SUBSCRIBE Youtube Channel for more Tutorial Videos:
Read more ...

Arduino Tutorial for Beginners Getting Started Part 1

This is the first tutorial for Arduino. You will learn on how to download and install Arduino IDE.

This is the first tutorial for Arduino. You will learn on how to download and install Arduino IDE. The latest installer also has include together with firmware installation. Before this, it require you to install firmware manually.


Arduino Tutorial for Beginners and Getting started with Arduino
Arduino Tutorial Part 1: Getting Started with Installation and Blinking LED


Steps:
1. Download Arduino IDE from Arduino website 
2. Install Arduino IDE
3. Plug in Arduino and try it with your first code


SUBSCRIBE Youtube Channel for more Tutorial Videos:
Read more ...

OLED SPI Display Module 128x64 white pixels Overview for Arduino


Overview of OLED Display Module SPI 128x64 white pixels for Arduino

Features:
Screen size: 0.96 inch
Resolution: 128 x 64
Viewing angle: more than 160 degree
Ultra-low power consumption: 0.06W - during normal operation
Voltage: 3.3V to 5V DC
Module Size: 27.8mm x 27.3mm x 4.3mm
SPI interface, using only 5 I/O pins
Driver IC: SSD1306
Pixel color: White
Self-illuminated, backlight is not required

Worldwide shipping:
Amazon
Aliexpress
Ebay
Banggood


SUBSCRIBE Youtube Channel for more Tutorial Videos:
Read more ...

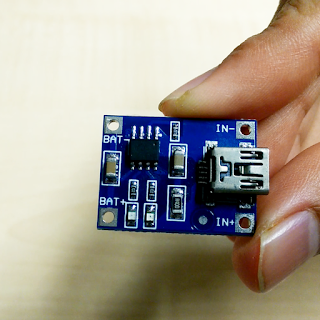
TP4056 Mini USB 5V 1A Lithium Battery Charger Module Overview

TP4056 is a lithium ion battery charger module that work using USB and wall adapter charger.

TP4056 is a lithium ion battery charger module that work using USB and wall adapter charger. This module equipped with mini USB port so you can charge it using normal phone charger or power bank.  


Overview of TP4056 Micro USB 5V 1A Lithium Battery Charger Module


Features:
Charge module: Linear charging
Current: 1A adjustable
Charge precision: 1.5%
Input voltage: 4.5V-5.5V
Full charge voltage: 4.2V
Led indicator: red is charging green is full charged
Input interface: mini USB
Work temperature: -10℃ to +85℃
Inversed polarity: NO
Size: small to 25X19X10mm

Worldwide shipping:
Amazon
Aliexpress
Ebay


SUBSCRIBE Youtube Channel for more Tutorial Videos:
Read more ...

XL6009 DC-DC Adjustable Step Up Voltage Booster Module Overview


This XL6009 chip is used to increase the DC voltage up to 35V. Input voltage of this converter is ranging from 3V to 30V. This DC-DC module also known as adjustable voltage booster module. XL6009 regulator has wide input range that capable to generate either positive or negative voltages. This regulator can be configure as either a boost, flyback, SEPIC or inverting converter. Built in  with N-channel power MOSFET and fixed frequency oscillator, current-mode architecture results in stable operation  over wide range of input and output voltage.

The application of this XL6009 can be seen from notebook car adapter, automotive and industrial boost, buck-boost, inverting converter and portable electronic equipment. Nowadays, many XL6009 can be found as a adjustable buck-boost voltage converter to be used Arduino project application.


This non-isolated boost consist of Integrated Circuit (IC) XL6009E1, 47uH (470) inductor, 100uF 50V SMD electrolytic capacitor, 220uF 35V SMD electrolytic capacitor, SS34 SMD 3A 40V Schottky Diode and 10K Preset 3296W-103. This DC-DC module based on IC XL6009 is the second generation of high-frequency switching technology that offers superior performance over the first generation technology of LM2577.


This DC-DC module use a non-synchronous rectification circuit with a short circuit protection. The conversion efficiency of this module is up to 92%. This module is rated at a maximum current of 3A whereby heatsink is needed to prevent it from overheat. 

Below is an overview video of DC-DC module and summary of this XL6009 booster.


Overview of XL6009 Arduino DC-DC Adjustable Step Up Voltage Booster Module


Features:
Wide Input voltage: 3V-30V
Output Voltage: 4-35V Adjustable
Output current: rated current 3A MAX - Heat-sink Needed
Conversion efficiency: Up to 92%
Switching Frequency: 50KHz
Rectifier: Non-Synchronous Rectification
Short circuit protection: current limiting, since the recovery
Operating temperature: Industrial grade -40 ℃ to +85 ℃
Full load temperature rise: 40 ℃
Load regulation: ± 0.5%
Voltage regulation: ± 0.5%
Size:47 x 26 x 15 mm

Worldwide shipping:
Amazon
Aliexpress
Ebay
Banggood

SUBSCRIBE Youtube Channel for more Tutorial Videos:
Read more ...

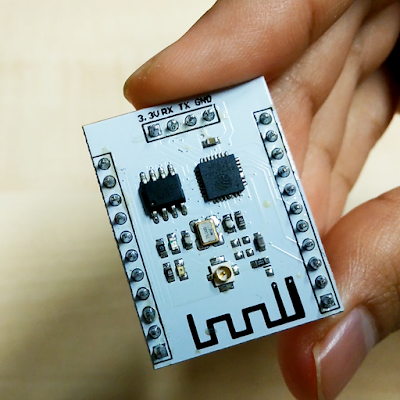
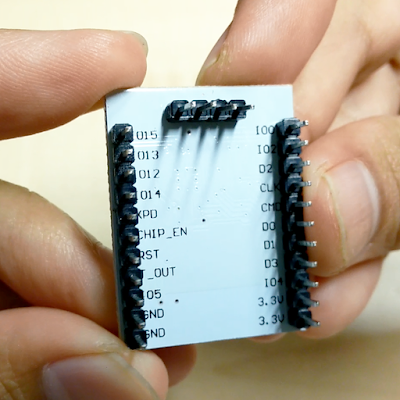
ESP8266 ESP-201 WIFI IOT Module Arduino IDE Compatible Overview

This ESP-201 module is one of the ESP8266 board version. This ESP8266 support both pcb antenna and external antenna.

This ESP-201 module is one of the ESP8266 board version. This ESP8266 support both pcb antenna and external antenna using U.FL connector. ESP-201 comes with Ai-Thinker firmware as they are the 3rd party manufacture of Espressif chip. With a dimension of 25mm x 35mm, this board required de-soldering and soldering modification of middle pins to make sure it is breadboard friendly.

This ESP-201 board is recommended as its offer more pins over ESP-01 with a cheaper price than ESP-12. ESP-201 utilizes ESP8266EX chip by Espressif Systems. ESP8266EX has been designed for mobile, wearable electronics and Internet of Things applications with the aim of achieving the lowest power consumption with a combination of several proprietary techniques. The power saving architecture operates mainly in 3 modes: active mode, sleep mode and deep sleep mode. The major application of this ESP8266EX chip to IoT includes home appliances, home automation, smart lug and lights, mesh network, industrial wireless control, baby monitors, IP cameras, sensor networks, wearable electronics, WiFi location-aware devices, security ID tags and WiFi positioning system beacons.

There are up to 17 GPIO pins.  They can be assigned to various functions by the firmware. Each GPIO can be configured with internal pull-up (except XPD_DCDC, which is configured with internal pulldown), input available for sampling by a software register, input triggering an edge or level CPU interrupt, input triggering a level wakeup interrupt, open-drain or push-pull output driver, or output source from a software register, or a sigma-delta PWM DAC. These pins are multiplexed with other functions such as I2C, I2S, UART and PWM.

ESP8266 ESP-201 (Top view)

ESP8266 ESP-201 (Bottom view)

Below is an overview video of ESP8266 ESP-201.


Overview of ESP8266 ESP-201 module


Features:
802.11 b/g/n
Wi-Fi Direct P2P, soft-AP
Integrated TCP/IP protocol stack
Integrated TR switch, LNA, power amplifier and matching network
Integrated PLLs, regulators, DCXO and power management units
+19.5dBm output power in 802.11b mode
Working voltage: 3.3v
GPIO Pin: 11
ADC: 1
USB-to-serial: No
Antenna type: External/PCB
Application: Standalone

Worldwide shipping:


SUBSCRIBE Youtube Channel for more Tutorial Videos:
Read more ...

Arduino Uno R3 Board Overview

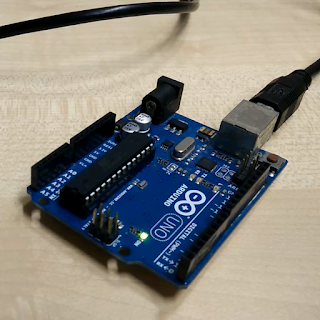
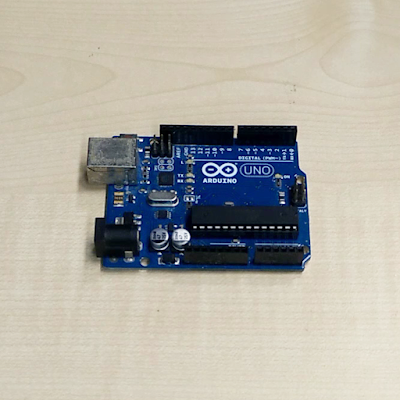
Arduino Uno is a microcontroller board based on the ATmega328P. It has 14 pins of digital input or output pin where only 7 of them can be used as a pulse width modulation (PWM) output. There are also 6 analog input pin available for analog purpose.

Arduino Uno is a microcontroller board based on the ATmega328P. It has 14 pins of digital input or output pin where only 7 of them can be used as a pulse width modulation (PWM) output. There are also 6 analog input pin available for analog purpose. The Arduino Uno can be powered via the USB connection or with an external power supply. The power source is selected automatically. Operating voltage of this Arduino Uno is 5V with input voltage ranging from 6-20V as a power source.

The Arduino Uno differs from all preceding boards as it does not use the FTDI USB-to-serial driver chip. Instead, it features the Atmega16U2 (Atmega8U2 up to version R2) programmed as a USB-to-serial converter. 

The Arduino Uno has a number of facilities for communicating with a computer, another Arduino, or other microcontrollers. The ATmega328 provides UART TTL (5V) serial communication, which is available on digital pins 0 (RX) and 1 (TX). An ATmega16U2 on the board channels this serial communication over USB and appears as a virtual com port to software on the computer. The 16U2 firmware uses the standard USB COM drivers, and no external driver is needed.

Arduino Uno R3 (Top view)

Arduino Uno R3 (Bottom view)

The Arduino Uno has a resettable polyfuse that protects your computer's USB ports from shorts and overcurrent. Although most computers provide their own internal protection, the fuse provides an extra layer of protection. If more than 500 mA is applied to the USB port, the fuse will automatically break the connection until the short or overload is removed.

The maximum length and width of the Uno PCB are 2.7 and 2.1 inches respectively, with the USB connector and power jack extending beyond the former dimension. Four screw holes allow the board to be attached to a surface or case. Note that the distance between digital pins 7 and 8 is 160 mil (0.16"), not an even multiple of the 100 mil spacing of the other pins. 


Input and Output Pins of Arduino Uno R3:


Each of the 14 digital pins on the Uno can be used as an input or output, using pinMode(),
digitalWrite(), and digitalRead() functions. They operate at 5 volts. Each pin can provide or receive a maximum of 40 mA and has an internal pull-up resistor (disconnected by default) of 20-50 kOhms. In addition, some pins have specialized functions:

  1. Serial: 0 (RX) and 1 (TX). Used to receive (RX) and transmit (TX) TTL serial data. These pins are connected to the corresponding pins of the ATmega8U2 USB-to-TTL Serial chip.
  2. External Interrupts: 2 and 3. These pins can be configured to trigger an interrupt on a low value, a rising or falling edge, or a change in value. See the attachInterrupt() function for details.
  3. PWM: 3, 5, 6, 9, 10, and 11. Provide 8-bit PWM output with the analogWrite() function. 
  4. SPI: 10 (SS), 11 (MOSI), 12 (MISO), 13 (SCK). These pins support SPI communication using the SPI library.
  5. LED: 13. There is a built-in LED connected to digital pin 13. When the pin is HIGH value, the LED is on, when the pin is LOW, it's off.


The Uno has 6 analog inputs, labeled A0 through A5, each of which provide 10 bits of resolution (i.e. 1024 different values). By default they measure from ground to 5 volts, though is it possible to change the upper end of their range using the AREF pin and the analogReference() function. Additionally, some pins have specialized functionality:

  1. TWI: A4 or SDA pin and A5 or SCL pin. Support TWI communication using the Wire library.


There are a couple of other pins on the board:

  1. AREF. Reference voltage for the analog inputs. Used with analogReference().
  2. Reset. Bring this line LOW to reset the microcontroller. Typically used to add a reset button to shields which block the one on the board. 


Below is an overview video of Arduino Uno R3.


Overview of Arduino UNO board

Features:
Microcontroller: ATmega328
Operating Voltage: 5V
Input Voltage recommended: 7-12V
Input Voltage limits: 6-20V
Digital I/O Pins: 14 - of which 6 provide PWM output
Analog Input Pins: 6
DC Current per I/O Pin: 40 mA
DC Current for 3.3V Pin: 50 mA
Flash Memory: 32 KB ATmega328 of which 0.5 KB used by bootloader
SRAM: 2 KB - ATmega328
EEPROM: 1 KB (ATmega328)
Clock Speed: 16 MHz


SUBSCRIBE Youtube Channel for more Tutorial Videos:
Read more ...